2026 Off-Grid RV Setup Guide: Proven Systems That Actually Work
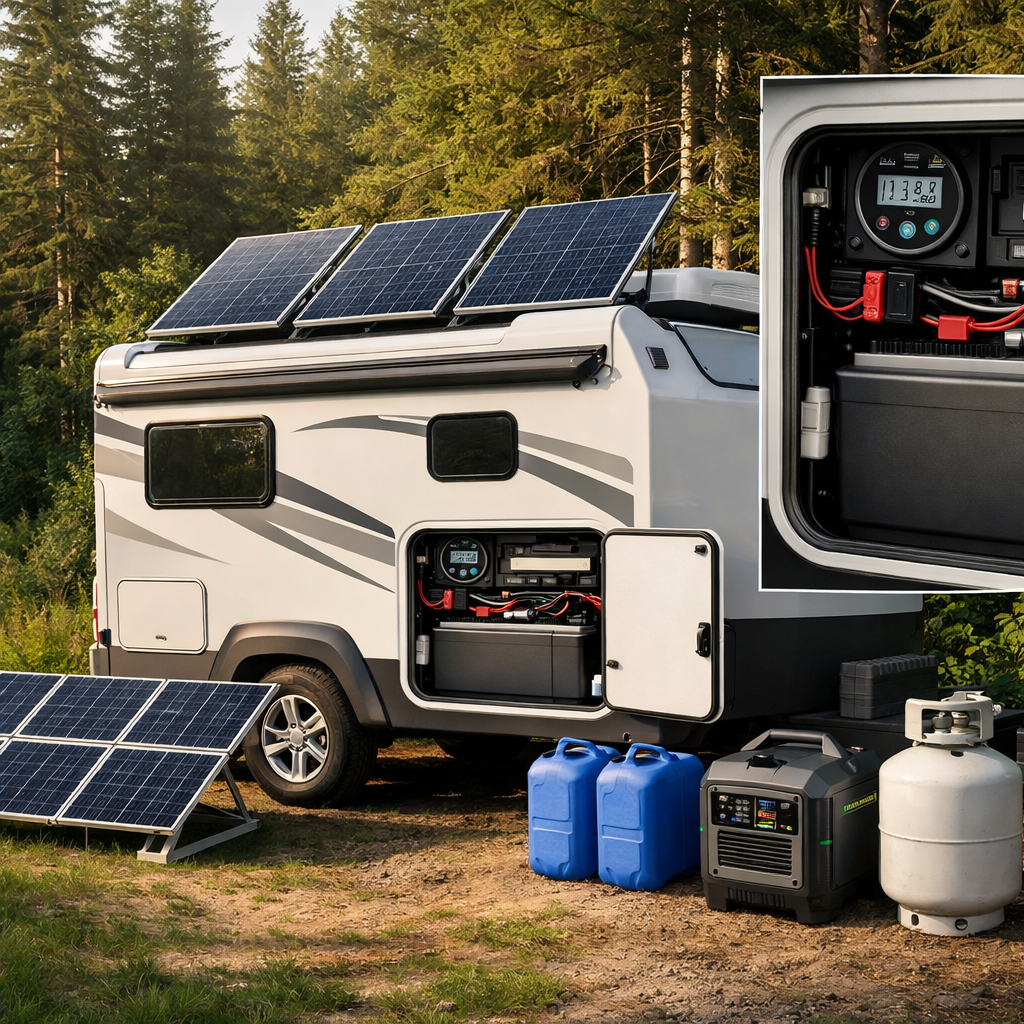
For 2026, the best off-grid RV setup balances right-sized power, smart water/waste planning, and reliable connectivity—while staying within your towing and licensing limits. In short: pair a LiFePO4 battery bank or expandable power station with an inverter sized to your largest loads, at least a few hundred watts of solar plus alternator/generator backup, and a two-layer internet plan. Off-grid RV camping means operating your rig independently of hookups—no shore power, water, or sewer—using onboard batteries/solar, water storage, and waste systems for days to weeks at a time. Today’s all‑in‑one power hubs can run air conditioning, induction cooking, and Starlink when correctly sized, making true boondocking practical for more RVers than ever, with fewer compromises and cleaner installs than legacy systems, as outlined in EcoFlow’s RV boondocking guide. This guide reflects RV Critic’s practical, right‑sized approach that favors reliability and ease of maintenance.
What off-grid means and how to plan your build
Off-grid RVing is self-sufficiency by design: you generate your own electricity, carry and conserve water, manage waste responsibly, and maintain connectivity without campground infrastructure. Planning starts by defining your trip profile, the climate you’ll face, the loads you’ll power, and the vehicle limits you must respect. RV Critic favors simple, redundant setups you can troubleshoot on the road.
All 2026-ready builds share three pillars:
- A right-sized energy system: battery bank or power station, inverter capacity for peak loads, and 12V/120V distribution that matches how you actually camp.
- Charging redundancy: solar as primary harvest, alternator/DC‑DC while driving, and a quiet generator or shore input for poor weather stretches.
- Stable connectivity: a primary internet link plus a low-power backup.
Modern power hubs can support high‑draw appliances and satellite internet when sized appropriately, streamlining installs and monitoring in one unit (see EcoFlow’s RV boondocking overview and RV Critic’s comparison guides).
Planning checklist (fill before buying parts):
- Trip length and season
- Climate and elevation (heat, cold, winter charging)
- Daily electrical loads (Wh) and peak/surge (W)
- Towing/weights (GVWR, GCWR, tongue weight) and cargo adds
- Campsite access (grade, clearance, road conditions)
- Internet/work requirements and coverage
- Emergency plan (recovery, medical, comms)
| Planning item | What to capture | Why it matters |
|---|---|---|
| Trip length/season | Nights off-grid, hottest/coldest temps | Sizes batteries, solar, heating/cooling |
| Daily loads | Wh/day and peak W | Dictates battery capacity and inverter size |
| Vehicle limits | GVWR/GCWR, tongue weight, payload | Ensures legal, safe towing after upgrades |
| Site access | Clearance, departure angles, road quality | Guides hitch choice, tire/suspension prep |
| Connectivity | Work vs. casual use, carriers | Right-sizes router/Starlink and power draw |
| Emergency plan | Assistance coverage, spares, extraction | Reduces risk on remote roads |
Step 1: Audit your power needs and peak loads
Start with a simple energy worksheet so your battery and inverter fit reality. Tally each device’s watts and hours used per day to get daily watt-hours (Wh), and note any 120V appliances that require an inverter. RV Critic’s load‑audit steps mirror this process so you buy once and wire once.
Example daily load ranges:
- Lights/phones/laptops: 300–500 Wh/day
- Compressor fridge or efficient RV fridge: 800–1,200 Wh/day
- Remote work (router + laptop + monitor + calls): 1,000–1,500 Wh/day These figures align with practical planning guidance for 2026 off-grid trips from Sunrich Energy’s complete guide.
Understand surge vs. continuous power:
- Continuous is the steady draw while a device runs.
- Surge is the brief, higher draw on startup (e.g., A/C compressors, pumps). Your inverter must handle both.
Track 12V vs. 120V loads. Favoring 12V devices where possible (fridge, fans, pumps) avoids inverter losses. High-powered roof fans can dramatically cut A/C runtime in shoulder seasons, saving hundreds of Wh per day.
Step 2: Right-size your battery bank and inverter
Translate your audit into usable capacity and output:
Capacity targets by trip profile (usable Wh):
- Weekend: 1,000–1,500 Wh
- 4–7 days: 3,000–5,000 Wh
- Full-time: 8,000–12,000 Wh Expandable power stations sized for Class C duty cycles illustrate these ranges well, with multiple kWh stacks common in 2026 rigs, as seen in Backup Power Hub’s Class C roundup.
Chemistry recommendation for 2026: Lithium iron phosphate (LiFePO4) is a lithium battery chemistry known for long cycle life, high usable capacity (often 80–90%), thermal stability, and lower weight than lead-acid. It supports deep discharges with minimal degradation, making it ideal for RV solar systems. Many 2026 off-grid builds have moved from AGM to LiFePO4 for weight savings and cycle life, a shift reflected in RV feature guides from Mars RVs.
Inverter and power hub guidance:
- Match continuous output to your heaviest sustained loads (e.g., microwave + outlets, or a 12V A/C if using an inverterless DC path).
- Ensure surge capacity covers compressor starts and power tool spikes.
- All-in-ones like the EcoFlow DELTA Pro 3 offer modular 4–48 kWh storage, up to 4,000 W output with 120V/240V options, and diverse charging inputs—useful when you want robust power without a piecemeal build.
- Budget-friendly examples: VTOMAN lists the Jump 1800 (1,800 W continuous, 3,600 W surge, ~1,548 Wh, ~3,000 cycles) and FlashSpeed Pro 3600 (3,600 W continuous, 6,000 W peak, UPS <20 ms), making them viable for midsize rigs and weekenders.
Rule of thumb: Target at least one day of usable capacity in batteries, plus solar harvest that replaces 50–100% of your daily usage in your expected sun conditions. RV Critic’s side‑by‑side comparisons help match inverter output and charging inputs without overspending.
Step 3: Design your solar and charging redundancy
Solar is your quiet, daily refuel—redundancy keeps you running through clouds and forests.
- Roof vs. portable: Roof arrays are always working and theft-resistant; portables can chase the sun under trees and tilt easily. Many RVers run a hybrid of both.
- Controllers: Use MPPT charge controllers for efficiency, especially in variable conditions. A Maximum Power Point Tracking controller optimizes voltage/current to extract maximum power, boosting harvest by up to ~30% over PWM in changing light, as summarized in Resident’s 2026 off-grid solar overview.
- Kits for DIYers: RV Critic’s kit‑buying guides can help you narrow options; complete off-grid kits that bundle panels, MPPT, inverters, and batteries simplify matching components (Renogy and similar providers offer 12V/24V kit paths).
- Redundancy: Solar as primary with a generator backup remains the most resilient mix for extended boondocking, with alternator/DC‑DC charging topping up while you drive.
- Market note: Portable solar options have expanded rapidly for 2026, bringing higher‑output foldables and ruggedized panels into mainstream overlanding gear, a trend highlighted by Wanderlust Hiker’s portable power coverage.
Sizing tip: In summer sun (good exposure), ~200–400 W can support light weekend loads; full-time or shoulder-season camping often benefits from 600–1,200 W roof + portable, depending on climate and shading. RV Critic generally recommends investing in array size before expanding batteries for shoulder‑season resilience.
Step 4: Configure water, waste, and conservation systems
Match your tanks and habits to your trip:
- Three-tank approach: Fresh, gray, and black sized to your duration and crew. Carry flexible jerry cans for refill shuttles when feasible.
- Filtration: In-line carbon filters or under‑sink systems are a standard boondocking checklist item; a compact gravity filter backs you up if pumps fail.
- Conservation tactics: Install low-flow faucets/showerheads, capture rinse water in dish tubs, and follow local rules on gray water. Reflectix and insulated window covers reduce heat gain/loss, indirectly lowering water used for cooling or extended wash cycles.
- Fuel choices: Propane remains common for cooking and heating in off-grid rigs, reducing electrical loads so batteries can focus on refrigeration, work gear, and ventilation.
RV Critic prioritizes conservation first—it lowers cost, weight, and charging demands.
Step 5: Optimize connectivity for remote areas
Build a primary + failover strategy:
- Primary: Starlink Mini or a quality multi-carrier cellular router with a roof-mounted MIMO antenna (e.g., Insty Connect class).
- Backup: A second carrier SIM or a compact hotspot for coverage gaps.
- Budget: Expect roughly $300–$1,000 for a router plus external antenna and cabling, with ongoing service on one or more carriers, according to a 2026 overview of off-grid internet options by SwiftNet WiFi.
- Learn to fine-tune: RVMobileInternet is a staple resource for RV‑specific testing and gear guidance.
- Power planning: All-in-one power hubs with ample inverter capacity can run A/C, induction, and a satellite link together when sized correctly—plan your worst‑case draw and confirm margins.
RV Critic’s connectivity guides summarize DC power draws and mounting tips for common gear.
Step 6: Verify towing, weight, and compliance for 2026 vehicles
Treat weights and licensing as hard gates:
- Ratings to verify: GCWR (combined), GVWR (vehicle), GAWR (axle), hitch class limits, and tongue weight. Recalculate with upgrades—batteries, solar, water, bikes, and generators add quickly.
- Platform nuance: Trim-specific tow ratings vary on 2026 SUVs, vans, EVs (e.g., heat pumps, tires, cooling packages), and Class C motorhomes. Check your exact VIN/trim.
- Licensing: Some states require endorsements or non‑CDL licenses above certain GVWR/GCWR thresholds; know the rule where you register and where you travel.
- Fitment: Confirm receiver class (2‑inch, heavy‑duty 2.5‑inch, or 3‑inch), accessory needs (bike racks, cargo), and whether a hidden/stealth option preserves clearance. For coastal or salted roads, prioritize corrosion‑resistant finishes and hardware.
RV Critic’s weight‑and‑balance checklist helps you verify margins after every upgrade.
Step 7: Safety checks, install sequence, and field testing
Follow a clean, verifiable build order:
Install sequence:
- Mount batteries with integrated or external BMS on a rigid base, with ventilation/thermal care per spec.
- Run DC main cables, grounds, and appropriately sized fusing/breakers close to the battery.
- Install MPPT controller(s) and wire to battery with correct gauge.
- Mount panels, verify polarity, and route MC4 leads with strain relief and roof sealing.
- Add inverter/charger or place power station; secure tie‑downs for off‑road vibration.
- Wire AC subpanel/transfer switch or inlet as needed.
- Add monitors (shunt-based battery monitor), smart plugs, and app integrations—Bluetooth smart plugs can reveal real‑time circuit usage and help prioritize loads.
Pre‑trip checks:
- Confirm battery usable capacity vs. daily needs and install a calibrated shunt monitor.
- Test solar harvest in full sun; compare expected vs. actual.
- Verify fusing, grounds, and temperature sensors on batteries and DC‑DC chargers.
Shakedown test:
- 24–48 hours of driveway camping using only your off-grid system.
- Practice load prioritization; simulate a cloudy day and use generator/alternator backup to validate redundancy.
- Inspect terminations and torque after travel vibration.
This sequence mirrors reliable pro installs and is easy to audit in the field—RV Critic favors it for DIYers.
Receiver hitches and towing hardware for off-grid access
Unimproved roads demand the right hitch and hardware. RV Critic’s hitch guides emphasize clearance, corrosion resistance, and recovery options for boondocking routes.
- Match receiver class to trailer GVWR and tongue weight with headroom for dynamic loads; weight distribution hitches (WDH) help on highway stretches before rough roads.
- Choose designs that protect departure angle and provide recovery tie‑in points when needed.
- Use stainless or coated hardware in salty environments and re‑torque after washboard miles.
Comparison: receiver types and use cases
| Receiver type | Typical size/class | Pros | Watchouts | Bike‑rack friendly |
|---|---|---|---|---|
| Standard 2‑inch | Class III–IV | Widely compatible, good clearance, WDH capable | May max out on heavy tongue weights | Yes (verify tongue weight reserve) |
| Heavy‑duty | 2.5–3.0‑inch (Class V) | Higher ratings, stiffer shanks, WDH ready | Heavier, needs correct reducers | Yes (use HD racks/pins) |
| Hidden/stealth | 2‑inch (concealed crossbar) | Better departure angle, cleaner look, often removable necks | Access panels, trim‑specific fitment | Often—confirm access and sensor impact |
2 inch and heavy duty receiver categories
When a standard 2‑inch works:
- Light to midsize travel trailers, small toy haulers, and accessory carriers within Class III–IV limits (often 6,000–12,000 lb trailer and 600–1,200 lb tongue, model dependent).
When heavy‑duty is required:
- Higher tongue weights, larger toy haulers, or frequent WDH use. Class V (2.5‑inch, sometimes 3‑inch) receivers reduce slop and improve stability.
Highway first, then backroad:
- Set up WDH and sway control for highway stability; remove or loosen as recommended before severe articulation on access roads.
Typical hardware notes (always follow the manufacturer’s torque spec):
- Hitch ball nuts: 3/4‑inch shank often 250+ ft‑lb; 1‑inch commonly 400–450+ ft‑lb.
- Receiver pins: 5/8‑inch HD pins are common; use rated pins and clips matching hitch class.
After corrugated roads, check frame brackets, fasteners, and pin/clip integrity.
Hidden and stealth options for compact SUVs and EVs
- Hidden/stealth receivers preserve approach/departure angles and airflow, key on compact SUVs and EVs.
- EV specifics: Maintain cooling airflow, avoid parking‑sensor interference, and use validated wiring harnesses for trailer lights and brake controllers.
- Verify trim fitment and underbody panel differences; expect moderate install difficulty with access panels on modern EVs/SUVs.
Stainless and saltwater safe hardware
- Use stainless or coated bolts, pins, and safety chains in salt and brine. Apply anti‑seize on stainless threads to prevent galling.
- Choose hitch accessories with sealed bearings and drain paths; inspect welds for rust migration.
- Maintenance cadence: monthly visual checks, quarterly torque verification, and annual hardware refresh in high‑salt use.
Dual bike rack compatibility and clearance
- Use receivers, racks, and extenders rated for dynamic loads; keep a tongue weight reserve after adding bikes.
- Maintain clearance with high‑rise shanks and consider swing‑away racks for hatch access; check rear camera/sensor impact on EVs.
- Hidden receivers with removable racks keep things stealthy when not in use.
Charging on the move and generator backups
Your resilient triad:
- Alternator/DC‑DC charger while driving
- Solar as primary harvest
- Generator or shore power as backup
Many RVers run solar primary with a quiet generator as weather insurance. Run heavy loads in daylight to leverage real‑time solar and preserve overnight battery reserves. RV Critic’s checklists help match alternator limits to DC‑DC input and fuse sizing.
Alternator and DC to DC charging strategies
- Use a DC‑DC charger matched to alternator output and battery chemistry (with a LiFePO4 profile). Add temperature sensing and ignition triggers to protect both vehicle and house batteries.
- If using a power station, confirm supported vehicle charging inputs (12/24V DC or EVSE adapters) and max input limits.
- Wire safely: size cables for current and run length to keep voltage drop under ~3%, fuse at both ends near power sources, and use abrasion‑resistant loom with strain relief.
Low noise generator as secondary power
- Tradeoffs: Generators provide continuous power yet add weight, fuel management, and noise versus solar’s silent harvest.
- Choose inverter‑generators sized to 125–150% of your typical continuous load, with eco‑throttle and built‑in CO sensors. Store stabilized fuel and test monthly.
- Use for cloudy stretches and high‑surge tasks. Place downwind, with a soft pad to reduce vibration, and respect quiet hours.
Climate control and efficient appliances
- Consider 12V DC air conditioners where your battery capacity allows—they avoid inverter losses and can be more efficient than 120V units in smaller spaces when properly ducted.
- Lean on high‑powered roof fans, reflective shades, nighttime ventilation, and Reflectix window covers to cut HVAC loads.
- Favor 12V fridges/freezers wired directly to DC; today’s portable compressor units are efficient, rugged, and well‑suited to overlanding and RV duty cycles, as reflected in 2026 portable power gear roundups.
RV Critic’s appliance guides cover efficiency trade‑offs and real‑world draw ranges to help you plan.
Seasonal tips for solar performance and battery care
- Winter: Low sun angle—tilt panels or use portables; expect fewer sun hours and snow shading.
- Summer: High irradiance but heat derates panels and batteries—ventilate components and avoid battery overtemp.
- Shoulder seasons: Oversize arrays or plan generator backup for long cloudy stretches.
| Season | Solar strategy | Battery care |
|---|---|---|
| Winter | Tilt/portable panels; clear snow; reduce loads | Avoid charging below freezing without heaters; insulate/heat battery bay |
| Summer | Max airflow; shade cabin, not panels | Ventilate aggressively; monitor temps; avoid 100% SOC for long storage |
| Spring/Fall | Flexible harvest plan; carry extra portable panels | Moderate temps—great for cycle life; keep DoD reasonable |
Operate heavy loads during daylight to align with solar harvest and reduce overnight depth of discharge. RV Critic generally favors slightly oversizing arrays for shoulder seasons over planning more generator hours.
Emergency readiness and roadside assistance scope
Pre‑departure essentials:
- Battery state of charge verified, solar angle set, generator tested and fueled
- Water topped and filtration ready
- Connectivity checked (primary + backup online)
- Leveling blocks, shovel, and traction aids staged RV Critic keeps this pre‑departure list short and repeatable.
Contacts card:
- Roadside assistance (policy and phone)
- Local ranger district/land manager
- Nearest hospital
- A tow‑capable friend who knows your route Remote roads may limit assistance—carry extraction tools and plan self‑recovery.
Compact tool/parts kit:
- Spare fuses/breakers, MC4s, crimpers
- Tire plug kit, compressor, recovery boards
- Torque wrench for hitch hardware, extra hitch pin/clip
- Tape, zip ties, sealant, multimeter
Frequently asked questions
How many solar watts and amp hours do I really need?
For weekends, plan roughly 1,000–1,500 Wh and 200–400 W solar; for 4–7 day trips, 3,000–5,000 Wh; full‑time often needs 8,000–12,000 Wh with a larger array, then refine using RV Critic’s load‑audit steps.
Can I DIY install lithium, MPPT, and an inverter safely?
Yes—if you follow proper fusing, grounding, wire sizing, and sequence per manuals. Use a quality MPPT, pure‑sine inverter, and a shunt battery monitor; RV Critic’s wiring checklists help keep you on‑spec.
Do I still need a generator if I have solar and lithium?
Yes—RV Critic treats a quiet generator as weather insurance even with solar and lithium. Size it to 125–150% of your typical continuous load.
What are the key towing weight ratings I must verify?
Confirm GCWR, GVWR, axle ratings, hitch/tongue limits, and payload against your loaded trailer—include batteries, water, bikes, and cargo. Check trim‑specific ratings and whether you need weight distribution or licensing; RV Critic’s weights checklist helps verify margins.
How do I get reliable internet off-grid without draining power?
Pair a primary link (satellite internet or a multi‑carrier router with an external MIMO antenna) with a backup carrier, and power it from DC when possible to minimize inverter losses. RV Critic’s connectivity guides outline low‑draw setups.