2026 Trailer Hitch Costs: Dealer Install vs DIY Breakdown
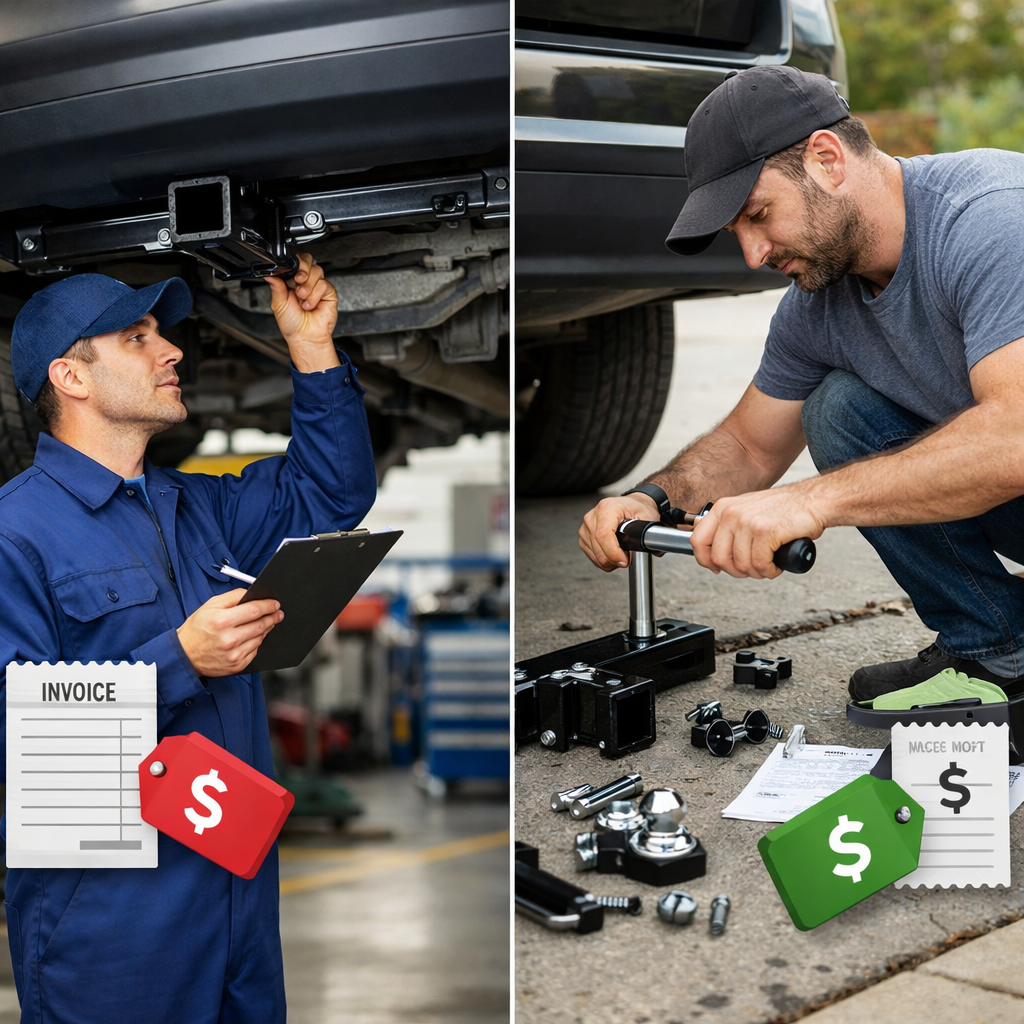
A trailer hitch is one of the highest‑leverage upgrades for towing, but the installed price varies widely. Bottom line: for simple, bolt‑on receiver hitches, DIY is usually the most affordable because you’re paying parts‑only and avoiding labor. Dealer installation becomes cost‑effective when wiring, programming, or warranty protection matters—and when your time has a high value. In 2026, expect parts for common Class III receivers to run a few hundred dollars, while professional labor commonly exceeds $100/hour. This RV Critic guide compares dealer‑installed factory hitches and aftermarket DIY, using real‑world parts, labor, wiring, and risk to help you choose confidently.
How we compare costs and value
RV Critic uses an apples‑to‑apples model across six factors: parts price, labor/shop fees, time cost, necessary tools, warranty value, and risk‑adjusted cost. RV Critic scores each path (dealer‑installed hitch vs DIY hitch cost) on four dimensions—cost, speed, support, and risk—so you can see the tradeoffs quickly in a hitch installation cost comparison, whether you’re weighing an OEM vs aftermarket hitch or a full tow package.
At RV Critic, “total installed cost” means more than parts plus labor. It’s the all‑in price to tow safely today and over time: parts, labor and shop fees, wiring and accessories, the value of your time and tools, plus the risk and warranty implications if something goes wrong later.
What drives hitch price
Hitch pricing moves with four big drivers:
- Hitch class and type: Light‑duty Class I–II receivers cost less than Class III–IV; gooseneck and fifth‑wheel systems add structure, hardware, and sometimes bed cuts.
- Vehicle complexity: Tight frame access, large heat shields, exhaust drops, or proximity to parking sensors and bumpers add time. Newer vehicles with integrated safety systems can require programming.
- Material/finish: Thicker steel, e‑coat plus powder‑coat, and rust‑resistant hardware add cost but improve longevity.
- Brand and availability: OEM parts usually fit cleanly and match fascia better; quality aftermarket options can be less expensive. Dealers often keep brand‑specific parts on hand, improving fit and turnaround (see this dealer vs DIY overview).
Shops bill labor by time and rate. “Book time” estimates (e.g., 1.5–2.0 hours minimum) standardize jobs but can inflate totals if your vehicle is simpler than the guide assumes, or if add‑ons are stacked into line items, as explained in industry dealer vs DIY guidance.
Fitment means how precisely a hitch matches your vehicle’s mounting points, clearances, and fastener requirements. Proper fitment ensures the hitch sits square, maintains ground clearance, clears exhaust and heat shields, and uses the correct hardware and torque values. Getting torque and alignment right is critical to preserve tow ratings and safety.
Parts cost by hitch type and class
Typical 2026 parts‑only ranges (USD), not including wiring, ball mounts, or brake controllers:
| Hitch type (typical use) | Parts-only range |
|---|---|
| Class I receiver (compact cars, light duty) | $120–$250 |
| Class II receiver (sedans, small SUVs) | $150–$300 |
| Class III 2" receiver (crossovers/SUVs/half‑tons) | $180–$400 |
| Class IV heavy‑duty 2" (half‑tons/HD SUVs) | $250–$600 |
| Gooseneck under‑bed kit (half‑ton/HD trucks) | $400–$900 |
| Fifth‑wheel rail/prep kit (bed rails/pucks) | $300–$700 |
Common add‑ons: ball mount and ball ($40–$150), safety chains ($25–$80), locking pin ($20–$50).
DIY typically pays parts‑only, which is why it’s often cheaper than dealer service (see this dealer service vs DIY comparison).
Receiver hitch class: A simple way to match hitch to job. Class I is for very light trailers (often up to ~2,000 lb GTW), Class II up to ~3,500 lb, Class III up to ~6,000 lb, and Class IV higher still. Always honor your vehicle’s published ratings; the lowest‑rated component governs.
Labor and shop charges
Professional installation labor rates commonly exceed $100 per hour, and specialty shops and dealerships may charge $125–$180+. Pros often finish faster thanks to lifts, specialty tools, and repetition, which can narrow the time gap with DIY even at higher rates (see this overview of pro shop rates and efficiency). “Book time” systems set expected hours and many shops apply a 1–2 hour minimum, which can push totals up even on straightforward installs. Dealerships employ certified technicians and work in safety‑controlled bays, contributing to cost—but also to consistency and support.
Wiring, programming, and accessories
Trailer wiring integration connects your vehicle to the trailer’s lights and brakes using 4‑pin or 7‑pin connectors, brake controllers, and (on newer vehicles) interface modules tied to the CAN‑bus. Some models require software calibration so the vehicle recognizes the tow package, disables rear sensors when towing, and manages charging to the trailer.
Incorrect DIY electrical work can create faults or damage and may limit coverage; some components and manufacturers specify professional installation for warranty eligibility (see this professional vs DIY installation discussion). Common accessory costs:
- Plug‑and‑play 4‑pin harness: $20–$60
- 7‑pin harness with module: $60–$200
- Brake controller (proportional/integrated): $80–$400
- Ball mount/ball/pin/lock: $60–$200
- Adapters and testers: $10–$40
Fit, integration, and appearance
Dealers source OEM or brand‑specific parts and verify fit; DIYers must confirm compatibility, torque specs, and any fascia or heat‑shield adjustments. A clean install preserves ground clearance and avoids visible gaps or uneven bumper cuts.
RV Critic quick fit checklist:
- Mounting holes align; no slotting or “making it fit”
- All fasteners torqued to spec with calibrated wrench
- Corrosion protection on bare metal and hardware
- Heat‑shield and exhaust clearance maintained
- Fascia trim (if any) straight, de‑burred, sealed
OEM vs aftermarket hitch: OEM hitches are designed for your exact bumper and underbody, often hiding crossbars and matching trim for a factory look. Quality aftermarket hitches can equal OEM tow ratings at lower cost but may show the cross‑tube or require minor trim. Choose OEM for appearance matching; aftermarket for value with proper ratings.
Warranty, safety, and liability
Hitches are safety‑critical. Without proper training and tools, DIY repairs can compromise safety and performance, particularly with braking and electrical systems (see this analysis of DIY vs dealership repairs). DIY installs typically come with limited or no labor warranty, and some manufacturers tie coverage to professional installation. Dealership techs and controlled bays reduce risk, and many offer after‑sales support to diagnose issues quickly.
Time, tools, and hidden expenses
Pros finish technical installs faster; analogous service data shows DIY projects can take 4–5 hours that a pro completes in under 2 hours, thanks to lifts, tools, and repetition. DIYers should budget time plus hidden costs for tools, broken fasteners, or rework; many kits include templates/videos that help but still demand patience (see this overview of pro vs DIY projects). Dealers sometimes provide loaners or shuttle options, reducing downtime; DIY avoids transport but risks extended downtime if complications arise.
Dealer installation
Pros
- Certified, highly trained technicians; safety‑controlled bays
- Specialized tools and brand‑specific parts on hand; faster, consistent results
- Integrated wiring/programming and warranty‑backed work
Cons
- Higher hourly rates and “book time” minimums
- Perception of expense; pricing clarity matters—transparent communication and written scopes build trust (see this dealership communication insight)
Dealer checklist
- Written estimate with parts vs labor and “book time”
- Wiring/programming scope and any coding fees
- Warranty terms (parts and labor), after‑install support
- Turnaround time and loaner/shuttle availability
DIY installation
Why it works
- Biggest savings come from avoiding labor; you control parts selection and schedule
- Ideal for straightforward, bolt‑on hitches with clear instructions
Risks to manage
- Limited/no labor warranty; wiring mistakes and misalignment can be costly
- Sealant, corrosion protection, or torque errors can shorten service life
Tool/skill checklist
- Torque wrench (calibrated), metric/SAE sockets, breaker bar
- Jack/stands or ramps; safety glasses and gloves
- Wire strippers/crimper and a 12V tester (if wiring)
- Ability to read torque specs, follow templates, and route wiring cleanly
Side‑by‑side cost scenarios
Assumptions: 2026 pricing, average rust‑free vehicle, typical shop fees. Dealer labor commonly >$100/hr.
| Scenario | Parts (hitch + wiring) | Labor rate | Book time (hrs) | Accessories | Tools/rental | Dealer total | DIY total | Complexity flags |
|---|---|---|---|---|---|---|---|---|
| Compact SUV, Class III + 4‑pin | $265 | $135/hr | 2.2 | $60 | $0 | $265 + (2.2×135) + $15 supplies + $60 ≈ $637 | $325 | Exhaust drop possible; fascia trim unlikely |
| Half‑ton truck, Class IV + 7‑pin + brake controller | $750 | $150/hr | 3.7 | $80 | $30 | $750 + (3.7×150) + $20 supplies + $80 ≈ $1,405 | $860 | Module programming; dash mounting |
| Fifth‑wheel rail/prep kit (under‑bed) | $550 (rails) + $300 (gooseneck ball kit, optional) | $160/hr | 4.0 | $0 | $60 | $850 + (4.0×160) + $20 supplies ≈ $1,510 | $910 (with ball kit) | Bed drilling; under‑bed clearance |
DIY savings line (avoided labor + shop supplies)
- Scenario 1: ≈ $2.2×$135 + $15 = $312
- Scenario 2: ≈ $3.7×$150 + $20 = $575
- Scenario 3: ≈ $4.0×$160 + $20 = $660
Note: Actual hours and rates vary by region and rust level; model‑year changes can add coding or trim steps.
When dealer install makes sense
- Your vehicle uses CAN/central modules, integrated brake controllers, or requires coding/calibration
- You want to preserve vehicle/electronics warranty and favor after‑sales support
- Signs you need a pro: non‑bolt‑on fitment, fascia cuts near sensors, module programming, limited workspace/time
When DIY makes sense
- Straightforward, bolt‑on receivers on older vehicles or models with no‑drill templates—and you own the tools and can torque to spec
- Safety checklist: confirm vehicle tow and tongue ratings, use thread locker if specified, re‑torque fasteners after 50–100 miles, and test lights/brakes before towing
- Plan extra time if wiring is involved; routing and testing add meaningful minutes
Total cost of ownership considerations
- Longevity: E‑coat/powder‑coat finishes, rust‑resistant hardware, sealed wiring, and proper torque reduce corrosion and loosening
- Wiring reliability: Protected routing, grommets, and dielectric grease prevent shorts; poor DIY sealing can cause leaks or electrical damage later
- Support: Professional installs can simplify claims or adjustments if something rattles, corrodes, or throws a fault code
- Seasonal checklist: Inspect receiver and hardware, re‑torque, check for rust, verify lighting and brake controller operation before each towing season
RV Critic’s recommendation
DIY is the most affordable path for simple, bolt‑on receiver hitches—especially if you already own core tools—because you avoid labor and book‑time minimums. Dealer installs become cost‑effective versus risk when wiring/programming or warranty protection is critical, or when your time is valuable and pros can finish faster with specialized tools. Decision rule: choose the dealer for electronics, warranty, or time; choose DIY for straightforward bolt‑ons with clear instructions and proper tools.
Frequently asked questions
Will an aftermarket hitch void my vehicle warranty
No—an aftermarket hitch doesn’t void your warranty by itself, but damage from improper install may not be covered and some parts require pro install for coverage. RV Critic recommends confirming terms in your vehicle and hitch manuals.
How much can I really save with DIY if I already own basic tools
Typically the full labor charge—often $200–$600 or more—plus shop supplies; RV Critic’s scenarios above show roughly $300–$660 in avoided labor alone. Your out‑of‑pocket is the hitch, wiring, and accessories.
Is it cheaper to order a factory tow package than add it later
Often yes when bundled at purchase; factory packages may include cooling, wiring, and programming. Adding later can cost more in labor and coding, though simple bolt‑on receivers remain affordable aftermarket.
Are aftermarket hitches as safe as factory options when properly installed
Yes—when matched to vehicle ratings and torqued to spec, quality aftermarket hitches perform comparably; the real risk is poor fitment or wiring. Follow instructions and re‑torque after initial miles.
What skill level and tools are needed for a safe DIY install
A confident DIYer with a torque wrench, socket set, jack/stands, and basic electrical tools can handle many bolt‑ons, per RV Critic’s guidance. The keys are correct torque, clean wire routing, and verified lighting/brake checks before towing.
Sources cited once each: dealer vs DIY overview; dealer service vs DIY comparison; pro shop rates and efficiency; professional vs DIY installation; DIY vs dealership repairs; pro vs DIY projects; dealership communication.