How to Verify Standard RV Comfort Features Before You Buy
A comfortable RV isn’t about glossy photos—it’s about verified systems that work in real conditions. This guide walks you through how to verify standard RV comfort features before renting or buying, with quick field tests, spec-sheet checks, and what’s truly “standard” by RV class. You’ll confirm power, HVAC, plumbing, sleeping, and connectivity features in one thorough walkthrough, spot where options are often misrepresented, and document findings for negotiation. Bring a simple inspection checklist, validate the unit’s identity and history first, then work outside-in and system-by-system. By the end, you’ll know if the RV really matches your travel style, from four-season promises to cargo carrying capacity and boondocking power. This is the same approach we use at RV Critic to evaluate comfort claims in the field.
Start with records and specs
Before you climb a ladder or flip a switch, ask for the build sheet, owner’s manual, and spec sheet. Match listed options—like dual-pane windows, heated tanks, solar, or an inverter—to what’s physically installed. Request service records to reveal recurring issues and maintenance habits, and verify fresh, gray, and black tank capacities fit your stays (short weekends vs. extended boondocking). Note the insulation numbers you see now; we’ll explain R-values later—and why they matter to temperature stability and tank freeze protection. Finally, confirm the VIN on the coach matches the title and ensure any claims about “four-season” or solar packages appear on the build sheet, not just on a sales sticker. At RV Critic, we always verify these package claims against the build sheet before considering them credible.
Tools you need for an effective walkthrough
Pack a compact kit so you can validate every comfort system on one visit.
- Essentials: bright flashlight, inspection mirror, ANSI-rated ladder, moisture meter, tire pressure gauge, dual-head air gauge (for cold checks), digital multimeter/VOM, surge protector/EMS, and a notepad for photos and pass/fail notes. A ladder, mirror, and VOM also enable a basic “hot-skin” check for stray AC voltage, while a dual-head gauge reaches inner duals for accurate pressures (What you need to perform your own RV inspection).
- Optional: a laser thermometer for verifying appliance and HVAC vent temperatures.
- Use a simple checklist to log each system, odd odors, moisture readings, and heat or scorch marks at electrical components.
Step 1: Confirm identity, ownership, and history
- Compare the VIN on the title to the physical VIN plate/sticker on the RV. “Use the RV VIN to match the title and check for accidents or salvage records” (RV inspection checklist).
- Pull an NMVTIS Vehicle History Report for salvage, odometer, and lien info. “NMVTIS is the only publicly available U.S. system requiring insurers and salvage yards to report regularly” (Pre-purchase RV inspection: what to check).
- Ask for service records and parts receipts. Missing or sparse history warrants caution and a deeper inspection.
Step 2: Exterior shell, roof, seams, slideouts, and awning
Water intrusion ruins comfort and value. Inspect the roof—especially around vents, skylights, antennas, and A/C units—for cracked sealant, soft spots, or pooled dirt. Check window and door caulking, and all exterior seams. Extend and retract every slide multiple times, watching for seal gaps and listening for grinding or binding. Deploy the awning to inspect fabric for tears, mold, and pooling. Confirm door and screen latches engage and steps retract smoothly. Hands-on tips for these checks—the same fundamentals we use at RV Critic—are demonstrated in this quick RV exterior inspection video and echoed in Lippert’s new-RV trip checklist.
Step 3: Power up and test electrical, batteries, inverter, and generator
- Connect to shore power with a surge protector/EMS to protect electronics and spot wiring faults at the pedestal (Ultimate RV set-up checklist). An energy management system (EMS) continuously monitors voltage, frequency, and wiring errors, disconnecting power if unsafe conditions arise. RV Critic recommends using an EMS at every hookup.
- Test every interior and exterior outlet, switches, lights, and GFCIs. Inspect the breaker panel and shore cord/plug for looseness, heat discoloration, or burns (RV inspection checklist).
- Verify battery age, resting voltage, and clean, tight terminals. If there’s an inverter, confirm it powers selected outlets and note its capacity and waveform.
- Run the generator under load for at least an hour with A/C and major appliances; listen for hunting or surging; check oil level and service intervals per logs (RV trip checklist).
Inverter (definition, 40–50 words): An inverter converts 12-volt DC battery power into 120-volt AC to run household outlets and small appliances when you’re not on shore power. Capacity, efficiency, and waveform (pure sine is best for sensitive electronics) determine what you can operate and how cleanly devices perform.
Step 4: Run plumbing, water heater, and tank systems
Open every faucet—including the outdoor shower—and run both hot and cold. Confirm the water pump cycles on and off properly and that lines pressurize without leaks. Ensure the water heater is full before turning it on to avoid dry-firing damage. Use a pressure regulator at the campground spigot to protect plumbing from over-pressure. Look under all sinks for drips and soft flooring, and verify fresh/gray/black tank capacities align with how you travel (short hookups vs. long boondocks). Flush the toilet repeatedly and observe for seal leaks or slow drains.
Step 5: Test heating, cooling, and ventilation
Turn on the A/C and furnace and verify even airflow at each vent; compare thermostat set points to actual interior temperatures. Run ceiling fans and inspect ducting for debris or crimped runs; check filter condition. HVAC issues show up fast during heat or cold, and poor airflow often signals duct balance or blockage.
R-value (definition, 40–50 words): R-value measures thermal resistance: higher numbers slow heat transfer and stabilize interior temperatures. In RVs, better wall and roof R-values, insulated floors, dual-pane windows, and enclosed/heated tanks improve four-season performance, reducing HVAC workload and helping prevent plumbing and tanks from freezing.
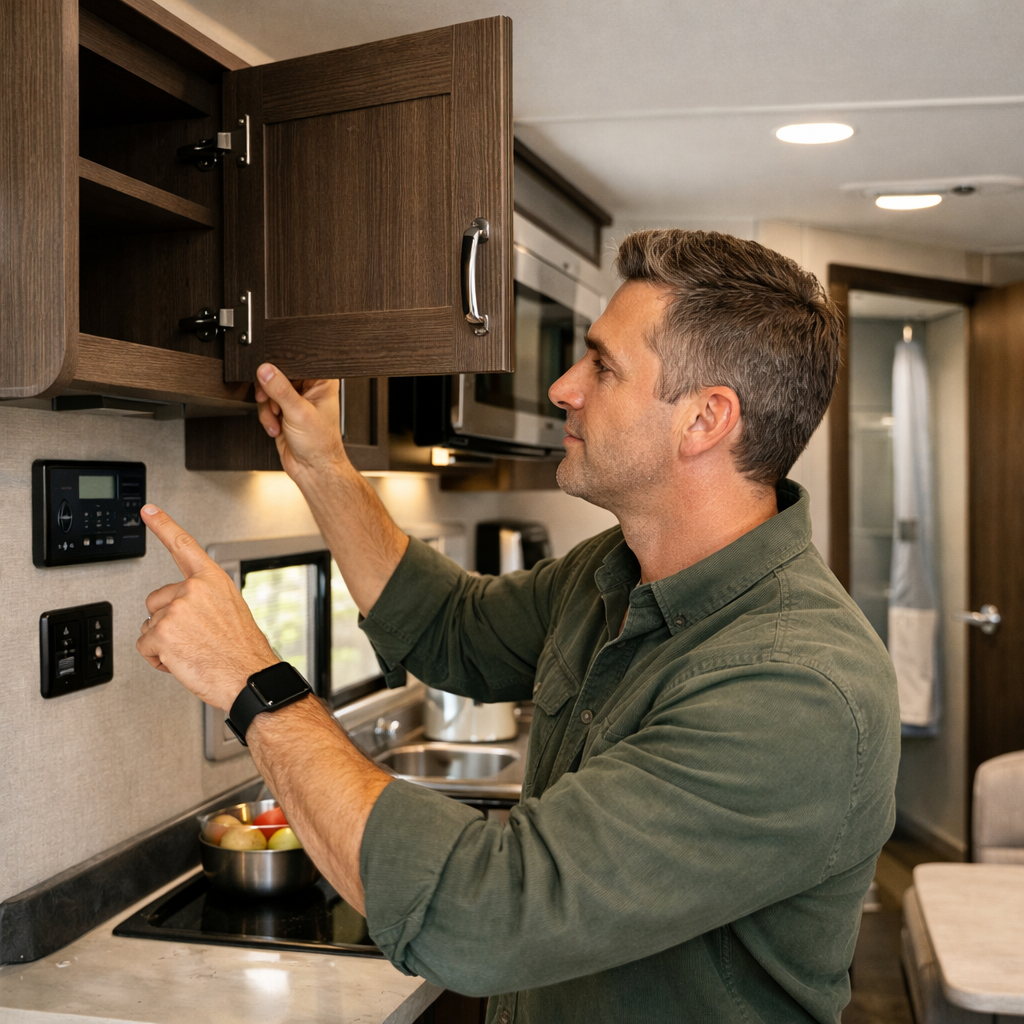
Step 6: Verify appliances, furnishings, and interior livability
Power on the refrigerator, stove, oven, and microwave; confirm each function and cycle. Use a laser thermometer to spot-check oven and burner temperatures for accuracy. Inspect upholstery, cabinet faces, and trim for water stains, delamination, or sagging. Walk every square foot to find soft spots indicating subfloor water damage; musty odors are red flags for hidden leaks (noted by many used-RV checklists like RV Online). Turn on audio/TV systems and confirm switches, latches, and drawers operate smoothly.
Step 7: Tires, hitching, chassis, weight ratings, and payload
Read tire DOT date codes and inspect tread for uneven wear, sidewall checking, or dry rot. Check cold pressures with a quality gauge; dual-head air gauges make inner duals easy. Verify hitch couplers, safety chains, breakaway switch, and stabilizers. Confirm the yellow sticker values and weigh if possible to validate payload.
GVWR vs. CCC (definition, 40–50 words): GVWR is the maximum allowable weight of the RV when fully loaded. Cargo Carrying Capacity (CCC) equals GVWR minus the RV’s actual weight with standard equipment and full fluids. Exceeding CCC degrades handling and braking, risks tire failure, and can jeopardize warranty or insurance coverage.
Step 8: Safety systems and propane integrity
Check smoke alarms, carbon monoxide detectors, and fire extinguishers for presence and expiration dates. Test LP appliances, inspect cylinders, regulators, and flexible lines, and sniff near fittings. If you suspect leaks, schedule a professional pressure/soap test. Confirm cylinder recertification dates and that tank brackets and straps are secure and undamaged.
Comfort features that typically come standard
Set expectations by RV type. Use the build sheet to confirm what’s on the specific unit, since “standard” can vary by trim and year.
| RV Class | Sleeping | Kitchen | Bathroom | HVAC | Power/Connectivity | Often optional |
|---|---|---|---|---|---|---|
| Travel trailer | Residential or short queen; convertible dinette/sofa in smaller models | 2–3 burner cooktop, microwave, 12V or gas/electric fridge | Dry bath common mid-size+ | 1 roof A/C, propane furnace | 12V battery, converter/charger, LED lighting, TV antenna | Solar, inverter, dual-pane windows, heated tanks |
| Fifth wheel | Queen/king master; multiple seating zones | Larger fridge, oven + microwave, ample storage | Full dry bath(s) | 1–2 A/Cs, ducted furnace | Pre-wire for solar; multiple TVs, more outlets | Heat pump, fireplace, larger inverter/solar arrays |
| Class A | Walk-around queen/king, drop-down bunks in some | Residential-size appliances in larger rigs | Full dry bath(s) | 2+ A/Cs, powerful furnace | Generator standard; robust 120V circuits | Dual-pane windows, heated tanks, solar/inverter packages |
| Class C | Queen over-cab + rear bed; convertible dinette | 2–3 burner cooktop, microwave, mid-size fridge | Full dry bath | 1–2 A/Cs, ducted furnace | “Most newer Class C motorhomes commonly include a generator and ~200W of solar” (RV buying guide) | Larger solar, pure-sine inverter, dual-pane windows |
| Class B/camper van | Convertible sofa/bed, sometimes murphy | Compact galley with 1–2 burners, small fridge | Wet bath or cassette toilet | 1 roof A/C or 12V A/C; diesel/LP furnace | Lithium battery bank, alternator charging; solar-ready | Induction cooktop, larger battery/inverter, 4x4 |
Sleeping and seating
Plan to lie on the main mattress for several minutes in your usual sleep position. Aim for a medium-firm feel around 5–6 on a 10-point scale, with decent edge support and motion isolation; an 8–12 inch thickness suits most sleepers (best RV mattress guidance). Many trailers and fifth wheels include a residential or short queen; smaller rigs often rely on dinette or jackknife sofa conversions. Check cushion density and lumbar support, and remember that musty odors or soft floors often indicate hidden water damage that will shorten furniture life.
Kitchen and cooking
A standard galley typically includes a 2–3 burner cooktop, microwave, sink, and a 12V or gas/electric fridge. Validate burner ignition, microwave power, and fridge operation on both battery/shore modes as equipped. Check counter space, storage access, and range hood ventilation. Verify oven and microwave temps with a laser thermometer for realistic cooking.
12V compressor fridge (definition, 40–50 words): A 12-volt compressor refrigerator runs on DC power from the house batteries. It cools quickly and remains efficient when the RV is not level, unlike absorption fridges. Because it draws steady current, your battery capacity, charging (solar/alternator), and any inverter determine practical off-grid runtime.
Bathroom and plumbing
Most full-size RVs include a separate toilet, sink, and shower; compact vans commonly have a wet bath. Run each faucet and the shower, testing both hot and cold while inspecting under-sink plumbing for drips and soft flooring. Confirm tank sizes meet your camping cadence—especially for extended boondocking.
Wet bath (definition, 40–50 words): A wet bath combines the shower, toilet, and often a small sink in a single waterproof compartment. The entire room serves as the shower area, which saves space in compact RVs. It requires diligent drying and ventilation to control moisture and prevent mildew and odors.
HVAC and climate aids
Most rigs ship with at least one roof A/C and a propane furnace; turn both on and verify even airflow from duct vents and accurate thermostat control. Optional comfort boosters include dual-pane windows, heated/enclosed tanks, heat pumps, and electric fireplaces. Tie these to the R-value you saw earlier: better insulation plus heated tanks meaningfully improves four-season credibility. Quick checks:
- Verify thermostat accuracy against a handheld thermometer.
- Inspect return filters and clean or replace if needed.
- Feel for balanced airflow at farthest vents.
- If a four-season package is claimed, confirm heated tanks and enclosed underbelly on the build sheet and by visual inspection.
Power, lighting, and connectivity
Test all lights, outlets, fans, and USB ports on both battery and shore power. Inspect the shore cord and plug blades for heat marks or burn discoloration. Confirm antennas, TV, and any Wi-Fi prep power up as expected. A quick at-a-glance list:
| Item | What to look for and how to verify |
|---|---|
| 12V house batteries | Check age labels, resting voltage, and that loads (lights/pump) don’t cause severe voltage sag. |
| Converter/charger | On shore power, battery voltage should rise to charging levels (≈13.6–14.4V depending on stage). Listen for cooling fan. |
| Inverter (if present) | Confirm it powers designated outlets; note capacity and pure sine vs. modified sine. Test with a laptop and small appliance. |
| Outlets and USBs | Test every receptacle with a plug-in tester/phone; confirm GFCIs trip and reset. |
| LED interior lighting | Even brightness without flicker on battery and shore power. |
| Antenna/Wi-Fi prep | Raise/lower antenna; confirm booster power light. |
| Solar readiness/panels | Verify roof hardware and controller ratings match the build sheet. |
| EMS/surge protector (add-on) | Use at every pedestal; check for fault codes before energizing the RV. RV Critic considers this standard practice. |
Red flags, documentation, and next steps
Major red flags include musty odors, soft floors, scorched cords or outlets, grinding slide motors, cracked roof seals, and any LP smell near fittings. Photograph every defect and ask for repair invoices and maintenance logs. If you uncover water damage, structural movement, or complex electrical faults, bring in a qualified pre-purchase inspector. After any dealer “fix,” re-test the same systems before you sign so you know the comfort issues are truly resolved (a common tip echoed by checklists such as RV Online’s used-buying guide)—a step we emphasize at RV Critic.
Frequently asked questions
How do I verify that an RV is truly four season ready?
Check R-values, dual-pane windows, and whether tanks/lines are enclosed and heated; then run the furnace and confirm even airflow. Use the build sheet—not marketing—to verify insulation and cold-weather packages; RV Critic’s steps above walk you through it.
How can I judge mattress and bed comfort during a quick inspection?
Lie in your usual sleep position for several minutes, aim for medium-firm (5–6), test edge support, and assess motion isolation. RV Critic recommends 8–12 inches of thickness for versatility across most sleepers.
What’s the best way to test an RV air conditioner and furnace on site?
Run both through full cycles, confirm even vent airflow and thermostat accuracy, and listen for normal noise. RV Critic also suggests spot-checking vent temperatures with a laser thermometer and verifying clean filters.
How do I confirm realistic cargo capacity and avoid overloading?
Compare the RV’s GVWR and posted CCC to your estimated cargo and passenger weight, and weigh the rig ready-to-travel when possible. Never exceed CCC; RV Critic prioritizes braking, tire safety, and handling over extra gear.
Which comfort features are often options rather than standard?
Dual-pane windows, heated/enclosed tanks, heat pumps, larger solar arrays/inverters, and outdoor kitchens are commonly optional. Always request the build sheet—RV Critic relies on it to confirm what’s actually included on the specific unit.